Before writing this article, I had never worked with Docker before. In fact, I didn't even know what it was. However, through a lot of Googling and trial-and-error, I found enough information to go from crawling to slowly walking. Let's get you there too.
In this demo, I'll be covering what Docker is, how to download it on Windows 11 OS, and getting Docker Desktop up and running with an example GitHub repo.
What is Docker? #
Docker is a platform-as-a-service (PAAS) software that allows users to put their entire application into a virtual "container." This means that, rather than using your desktop to host an application, you can isolate your entire app within a single container--allowing you to manage multiple applications at once and utilize multiple versions of required software for your applications. All of this means you can manipulate your applications with more power and flexibility than was previously possible.
For more information about containers and Docker's logic, go to this guide.
Downloading Docker for Windows 11 #
Before we get into the steps, you need to make sure your machine is running Windows 11 and is at least 64-bits. You can do this by navigating to the Windows Settings application and going to System > About. In this menu, you'll find your System Type and Windows Edition.
Step 1: Download and Install Docker Desktop #
Click this link and click the "Download for Windows" button. Your version should be automatically detected.
Once you've downloaded the installer, run it. At this point, you'll be taken through the setup wizard. When you finish this, you should be able to open the application.
Step 2: Uh oh. #
Docker has some ancillary tools that you also need to install just to get it up and running, so you'll likely receive an error when you first try to open it. It happened to me, and this is the error message I saw:
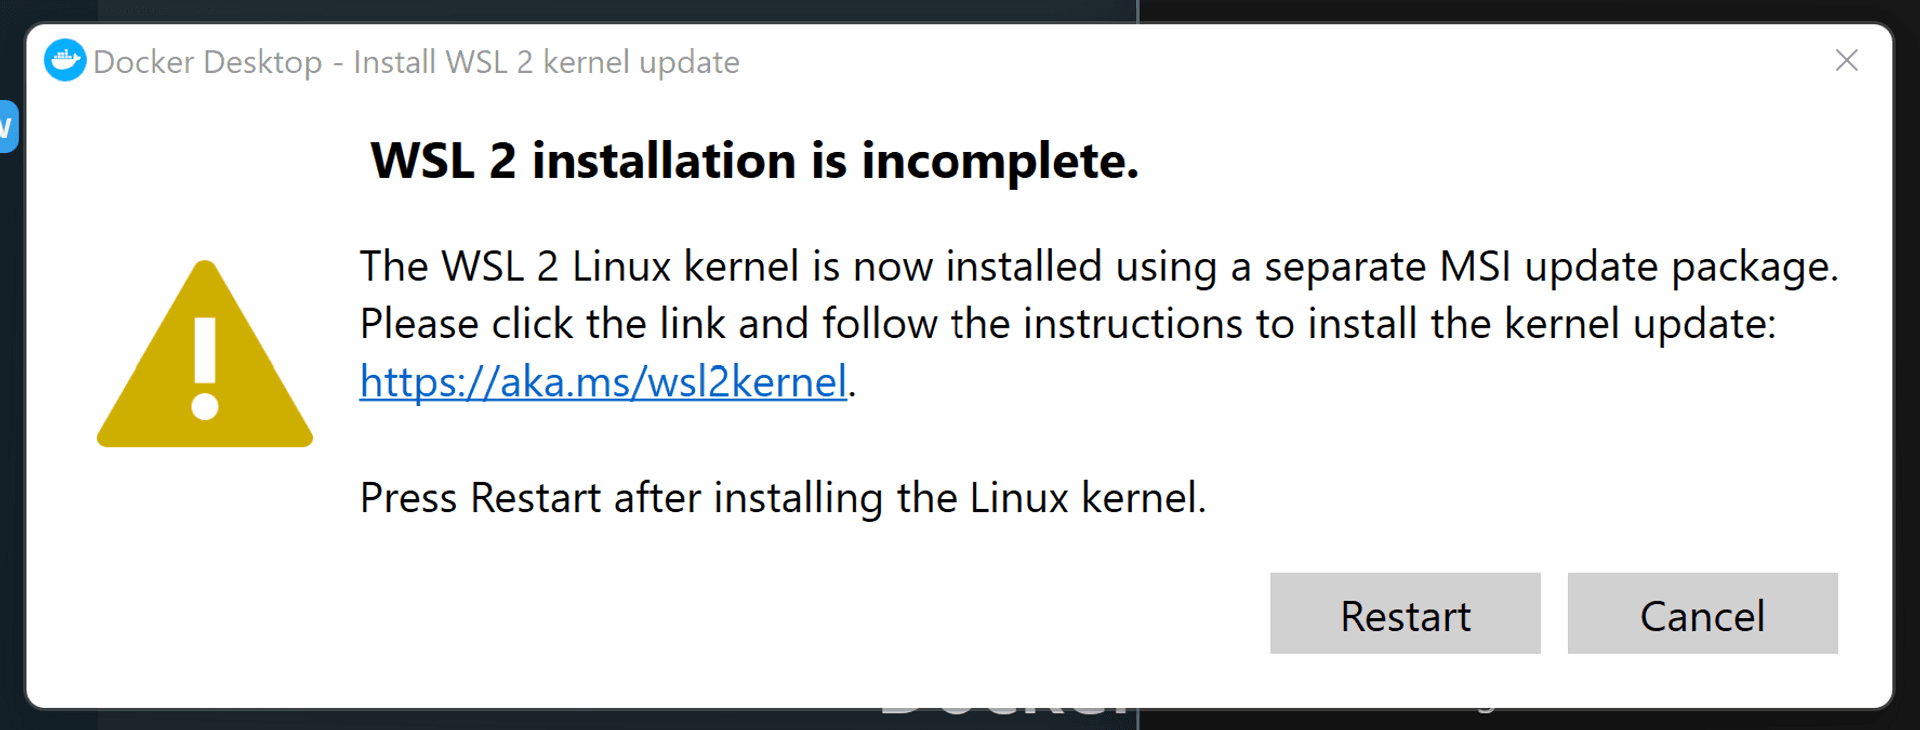
Do not worry, the resolution is very simple...
Step 3: Install WSL 2 #
WSL, or the Windows Subsystem for Linux, helps ensure Docker can compatibly run with your Windows computer. To install it, you can click the link in the error message shown above if it pops up on your screen when you try to open Docker, or you can go to this link.
Go through steps four and five of the instructions in that link, then try closing Docker and opening it again.
Step 4: The Tutorial #
When you re-open Docker, it should open successfully and you'll see a tutorial. I highly recommend going through it, as it's brief but helpful in getting you acclimated to the system.
(Optional) Step 5: Sign in/up #
Since this was my first time using Docker, I had to sign up using the button in Docker Desktop. If you've never used Docker, it's worth creating an account so you can use the platform to its fullest.
At this point, you've successfully installed Docker Desktop! Next, we'll take a look at how to get started with an example demo.
Example with HAXcms #
To get started, we'll need a GitHub repo with a fully-fledged application. In my case, I'll be using HAXcms: a content management system that encapsulates the incredibly accessible authoring experience of HAX. Let's get going!
Step 1: The Dev Environments Tab #
Navigate to the "Dev Environments" Tab in Docker Desktop, and click the "Create" button. Click the "Get Started" button in the guide that pops up, and the following screen should appear:
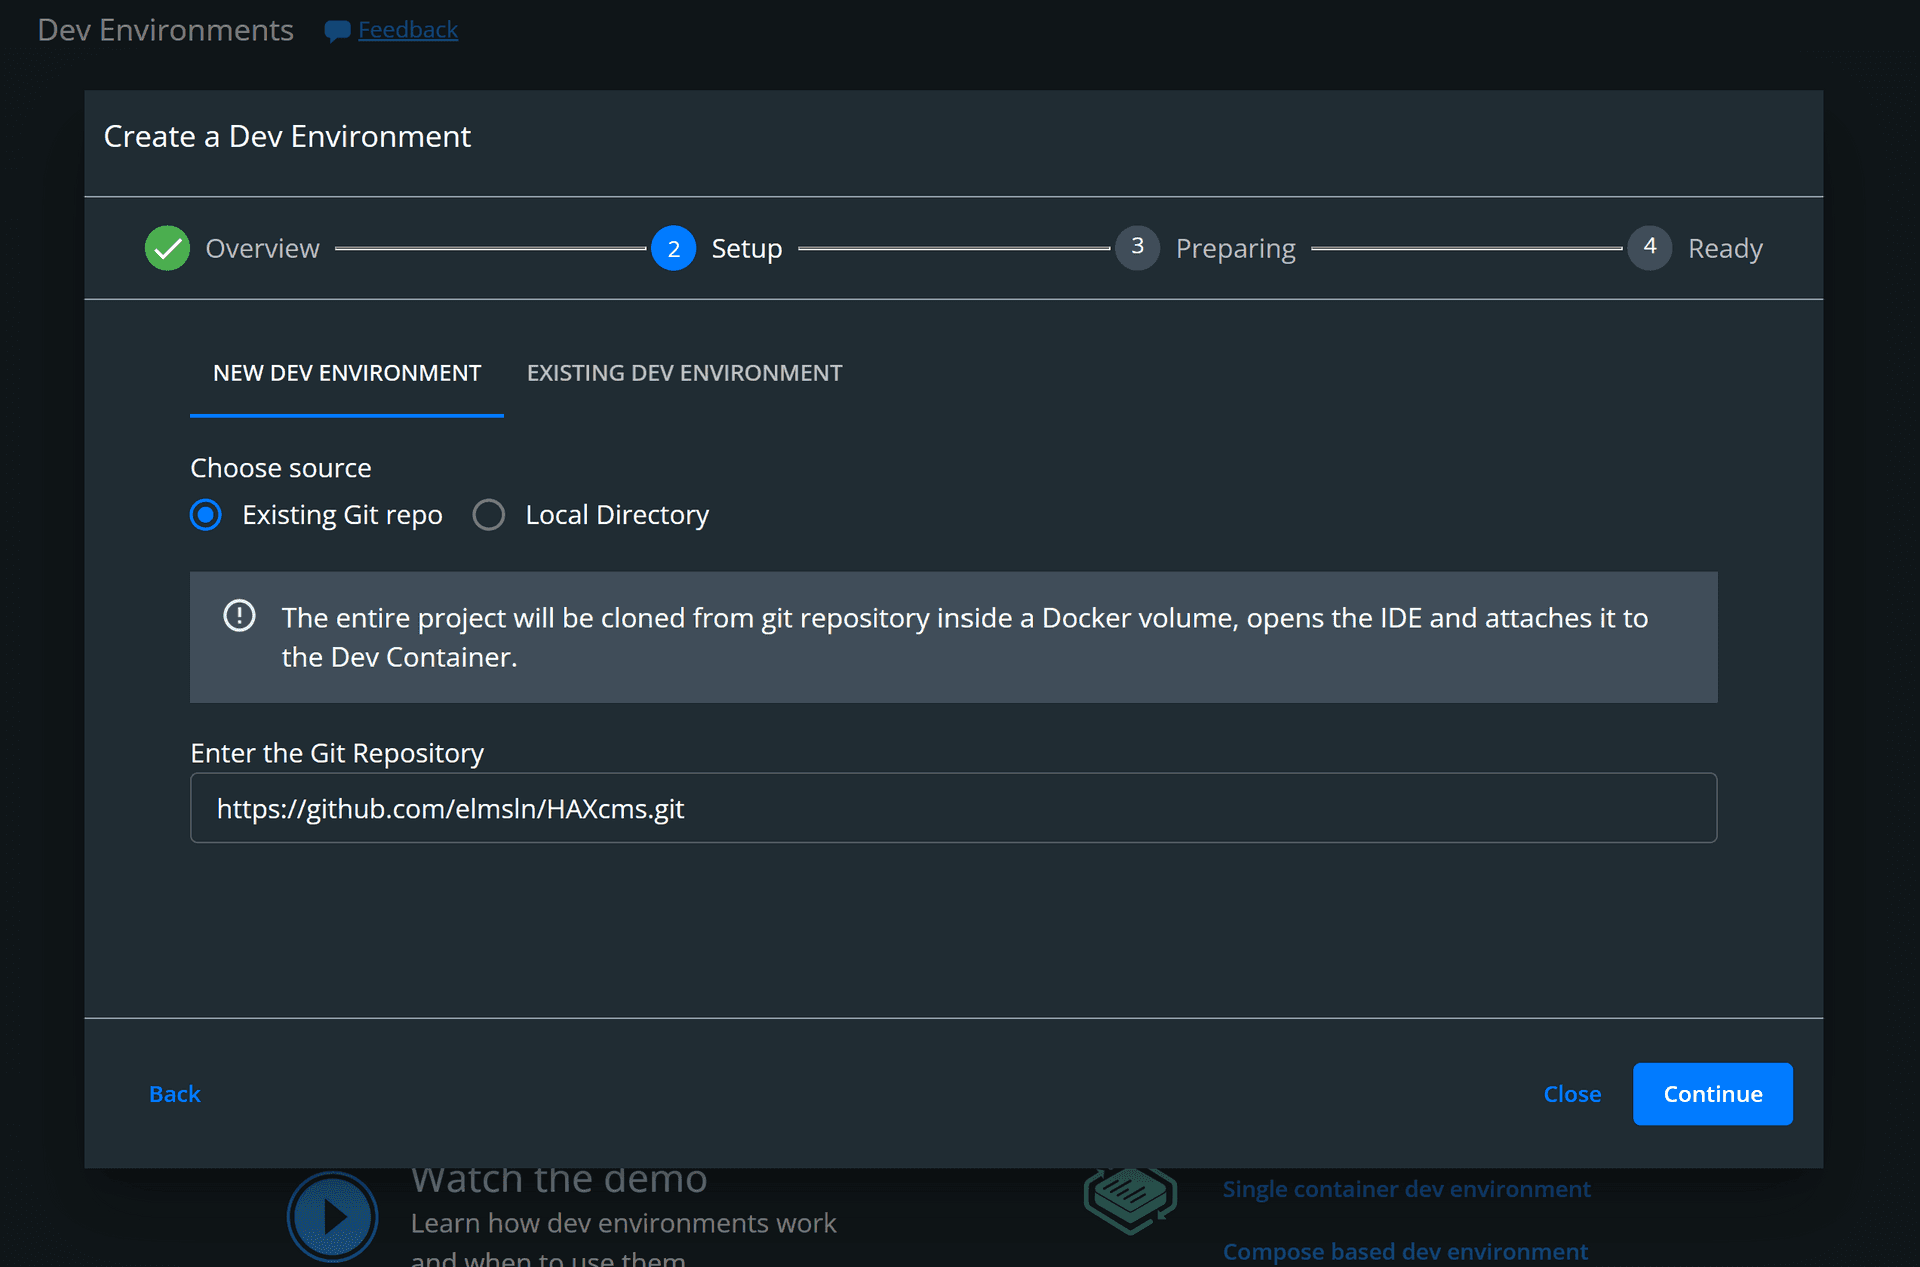
As you can see in the image, I've already put a link into the "Enter the Git Repository" box. Below, I'll show you where to get a link to put in this box.
Step 2: Getting the HTTPS Link From a GitHub Repo #
Navigate to your GitHub repo of choice, and select the green "Clone" button. A dropdown menu should populate, and you'll want to copy the link that appears in the HTTPS tab. Kind of like this:
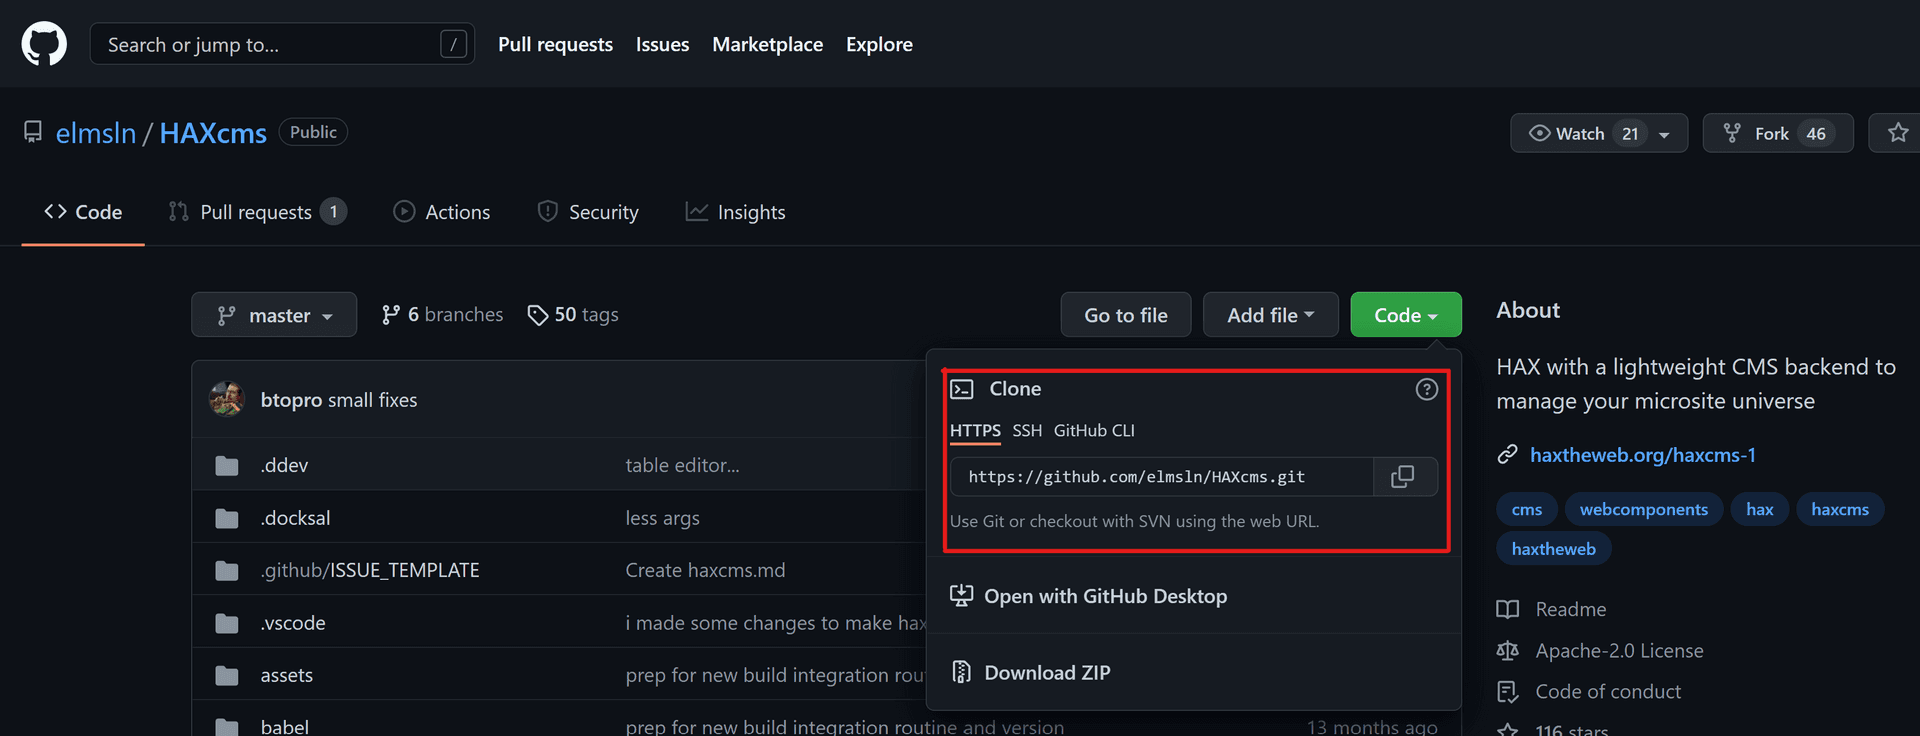
Paste the link you copied into the "Enter the Git Repository" box, and click the "Continue" button.
The Dev Environment will take a little time to generate, then you'll see a page indicating that it's all set up.
Step 3: Get Going in VSCode #
At this point, your Dev Environments tab in Docker Desktop should be showing the container you created and your Containers/Apps tab will show that your container is running. Way to go!
Now, you can start working with your container in VSCode. To do this, click on the container listed in your Dev Environments tab. It should look similar to this:
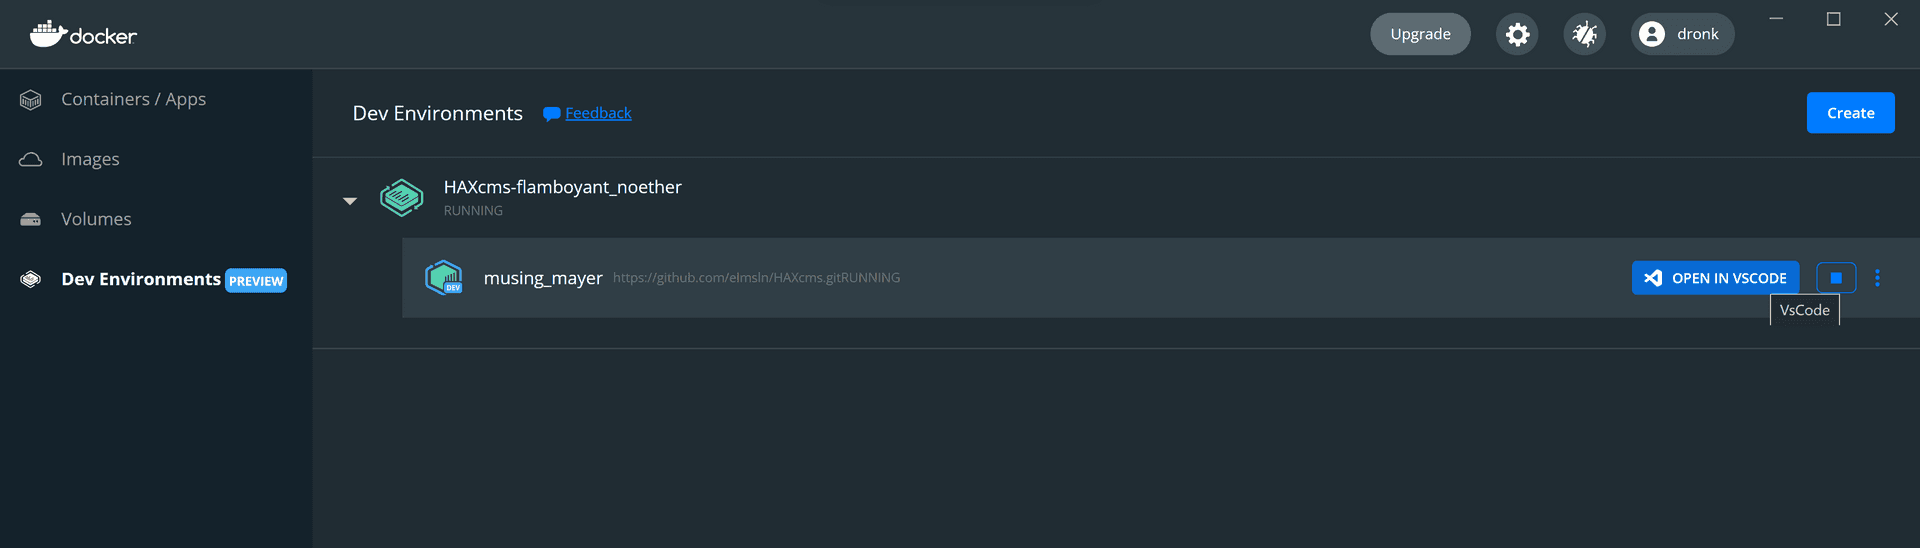
To open VSCode, just click the button. When you do, you may have to install one or two additional tools--or even VSCode itself if you don't have it already. If this is the case, follow the steps provided and you'll be viewing your container's code in no time!
For more information about Docker and initial steps, feel free to view this guide from freeCodeCamp. I found it very useful, especially for learning about Docker's basic commands. Good luck!
🙏🙏🙏
Since you've made it this far, sharing this article on your favorite social media network would be highly appreciated 💖! For feedback, please ping me on Twitter.
Published